The bow tie , you can buy it ready-made or order it as a self-tie . In the latter case, you will have to tie it yourself. But yes, how do you actually tie a bow tie? In this post we would like to tell you more about it and explain how to tie a bow tie in 10 simple steps using our 10-step bow tie method.

Many people worry in advance or experience stress just before a gala or wedding.
"It must be very complicated. How does that work in front of a mirror? And is a bow tie for me if I don't succeed a few times?"
Very understandable, but you don't have to worry. It takes some practice, but if you follow this step-by-step plan, you will be tying your self-tie with a smile in no time.
Remember when tying your shoelaces seemed like such a difficult task? But once you got the hang of it, it became automatic and you couldn’t turn your hand to it anymore. And the same goes for the bow tie. Just keep in mind that it’s identical to tying shoelaces.
To tie a bow tie, stand in front of a mirror and follow these steps:
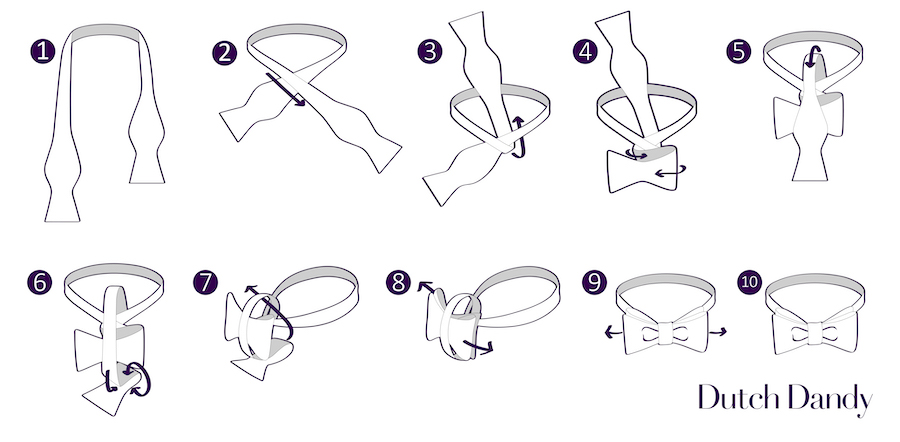
In the images below we explain step by step what you need to do.

|
Step 1. Place the bow tie around your neck so that end "A" is approximately two inches longer than end "B." |

|
Step 2. Then cross the long end "A" over the shorter end "B". |
|
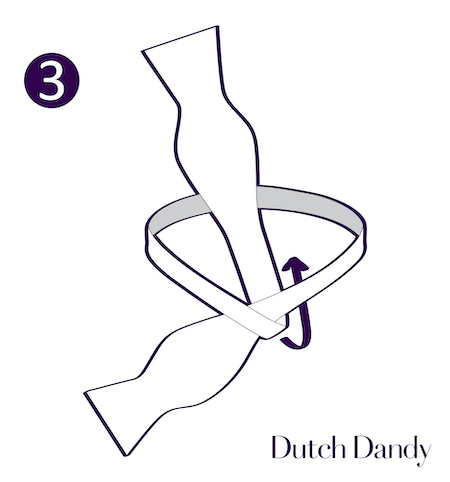
Step 3. Bring the longer end “A” up by pulling it up behind the shorter end “B”. |

|
Step 4. The remaining end B is the front of the bow tie as you will wear it later. Fold end "B" over each other twice at the front to create the butterfly shape. |
|
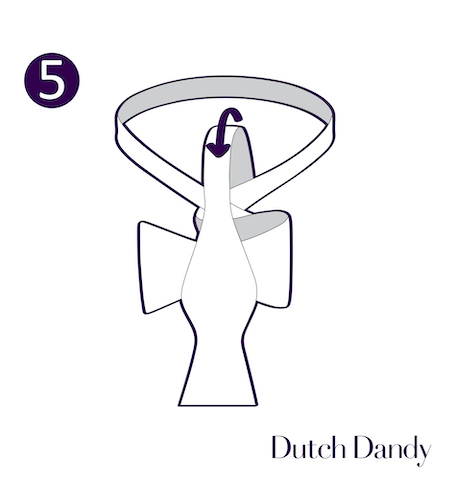
Step 5. Now bring end "A" down from the front over the butterfly shape of "B" that has just been formed. |
|
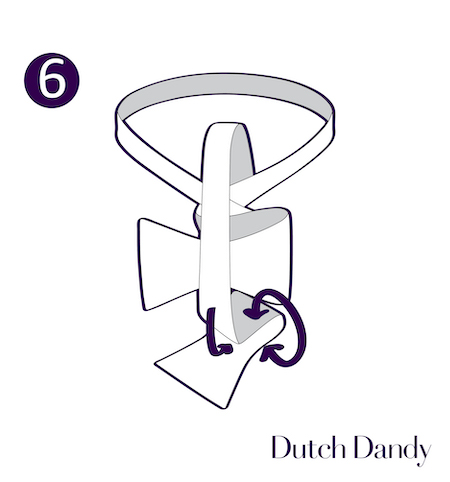
Step 6. Hold everything in place and now fold end "A" in half as well in the shape of a butterfly. |

|
Step 7. Now put the second butterfly shape through the loop behind the previously made butterfly shape of "B". So that they end up behind each other behind spoon. |
 |
Step 8. Now pull the whole thing tight, on both sides . And a bow tie is created. |
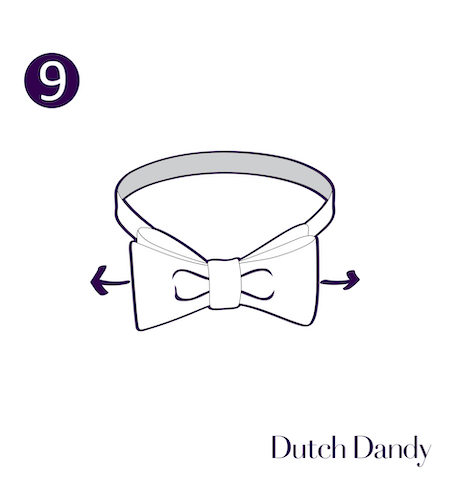 |
Step 9. Make sure the bow tie is in proportion by tucking in the ends. pull, making sure the bow tie sits nicely in the middle of the collar. |
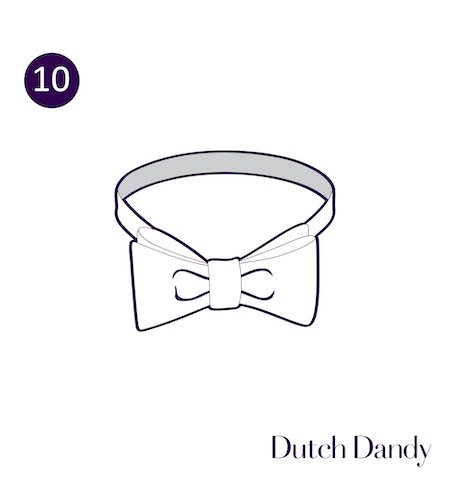 |
Step 10. Voila, you did it. |
Keep the following tips in mind when wearing the bow tie.